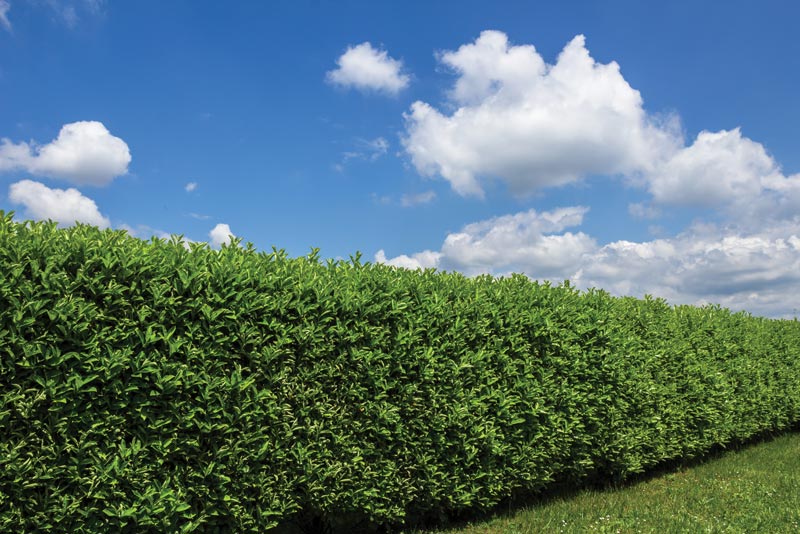
Have trouble turning out healthy, handsome hedges, or find their upkeep impossibly time-consuming? Read on. Photo by Kyna Studio
An entire line of shrubs in bloom is quite striking and can make a bold, attractive statement. Tall hedges can solve the need for screening, visual separation and accenting. Hedges can serve as a temporary backdrop to a green until trees gain enough size to fit the bill. Well-designed and well-placed hedges can indicate various distances to the pin and outline a particular space on the golf course.
Unfortunately, there are at least as many negatives associated with hedges on the golf course as there are positives. Perhaps the biggest problem regarding hedges is the expectation of uniformity, which just isn’t realistic. The image often conjured is that of an inanimate object, like a couch or a piece of landscape art, but aside from fading or softening, such items don’t change over time. As a growing piece of the golfscape, a hedge changes nearly constantly and needs to be managed accordingly.
Golf course hedges 101
Siting
Like all ornamental plants on the golf course, hedge placement should be determined following the tenets of the foundational standard “right plant, right place.” The many elements of “right plant, right place” — including sun/shade considerations, height, color, evergreen vs. deciduous, flower features and pest susceptibility — play a big role in the success of a planting. The “therefore consideration” — the overriding question, “What’s it there for?” — helps in location as well as species selection. Space separation and amenity are usually the two functions that most designers and architects point to when siting hedges.
Planting
Planting hedges is similar to installing individual shrubs, except that instead of a mass or grouping of three, five or seven, the plants are arranged in a line. The importance of digging a wide but not deep hole, untangling the roots before planting, backfilling with the existing soil (avoiding amendment with compost or potting soil), and thoroughly moistening the roots remains the same.
Watering
For most species, roots are best kept moist, not soggy or dry. However, some hedge plants do grow best when maintained on the dry or wet side, so it’s wise to check with local university Extension professionals for specifics. One of the easiest ways to water a hedge is by taking advantage of its linear arrangement and simply laying a soaker hose along the base of the stems and running it as needed.
Pest control
By the nature of a hedge, many plants will be installed, so pest-prone species should be avoided if possible. Insects such as the honeysuckle aphid and diseases such as boxwood blight greatly increase the maintenance level of hedges. Weed suppression between plants is important, not only because weeds are unattractive, but because they compete with the desirable shrubs for sunlight, water and nutrients. In many cases, wood chip mulch, a preemergence herbicide application and occasional hand removal will suffice for weed control.
Editor’s note: An arborist and entomologist offer a roster of the “super pests” of woody plants, symptoms to watch for, and strategies to keep these threats at bay in Protect trees and shrubs from ‘super pests’.
Pruning
By far, pruning is the most time-consuming, difficult-to-perform and commonly misunderstood practice. It needs to start the first year after planting, for both formal and informal hedges.
Hedge maintenance missteps
A hedge is a high-maintenance item, not a set-it-and-forget-it element. Hedges require periodic pruning — at least yearly, sometimes several times per year. This requires time and effort by a staff member with experience; it’s pretty easy to make a hedge look bad.
However, cutting stems at the same location time after time can produce areas of knotty growth, where stems often cease to be produced from meristematic tissue, thus leading to a hole or even large sections of leafless stems.
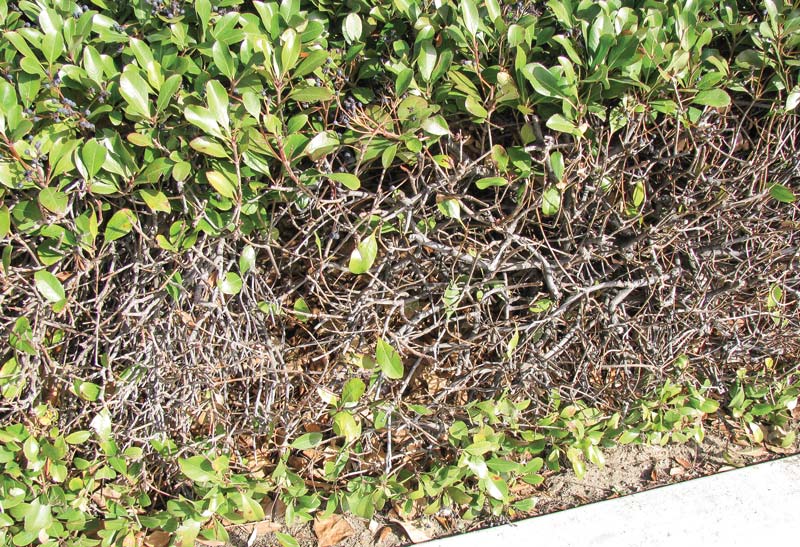
Knotty growth is often the result of pruning the same area of a hedge year after year. Photo by John Fech
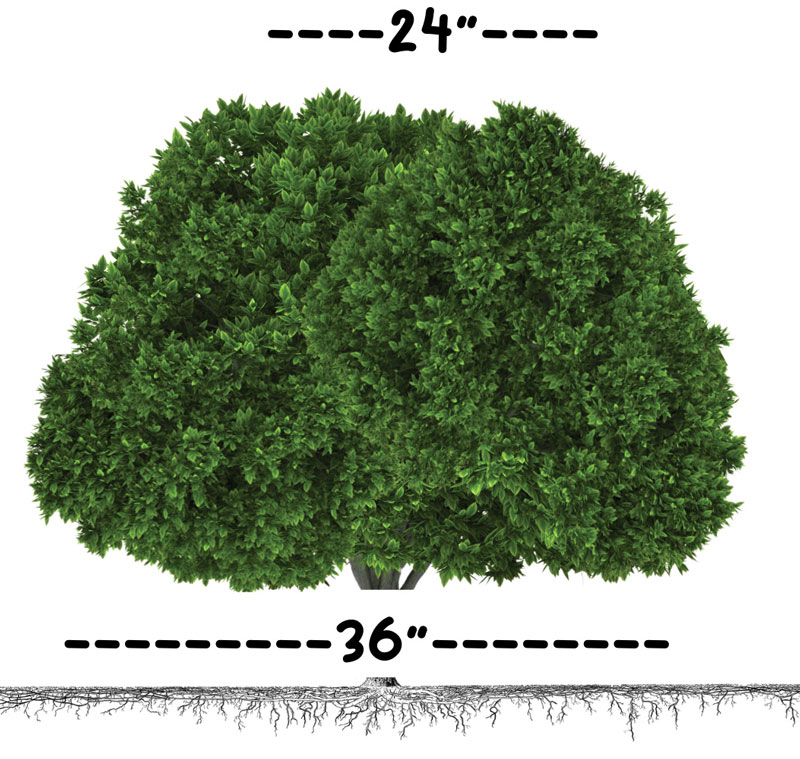
Keeping the hedge’s top narrower than the bottom helps keep the planting full and healthy. Image by Rachel Wright, University of Nebraska-Lincoln
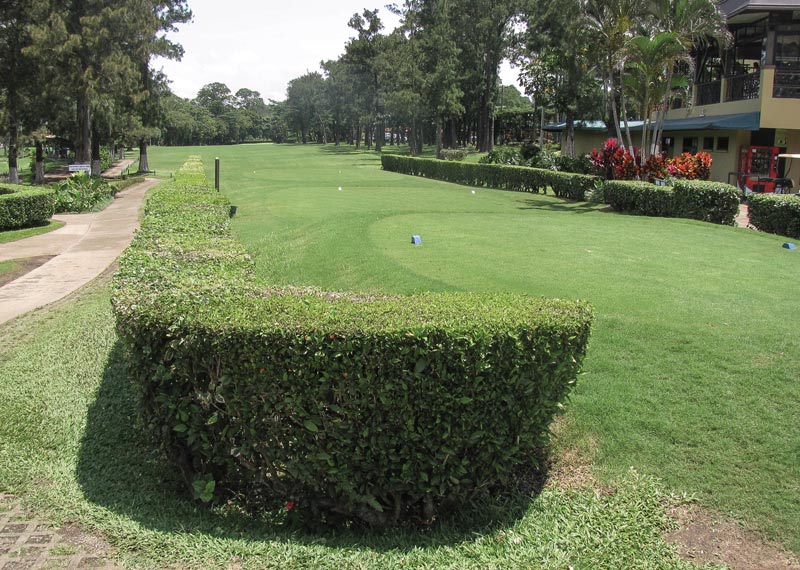
Repeated shearing can result in an unnatural shape, with the hedge’s top wider than the bottom. Photos by John Fech
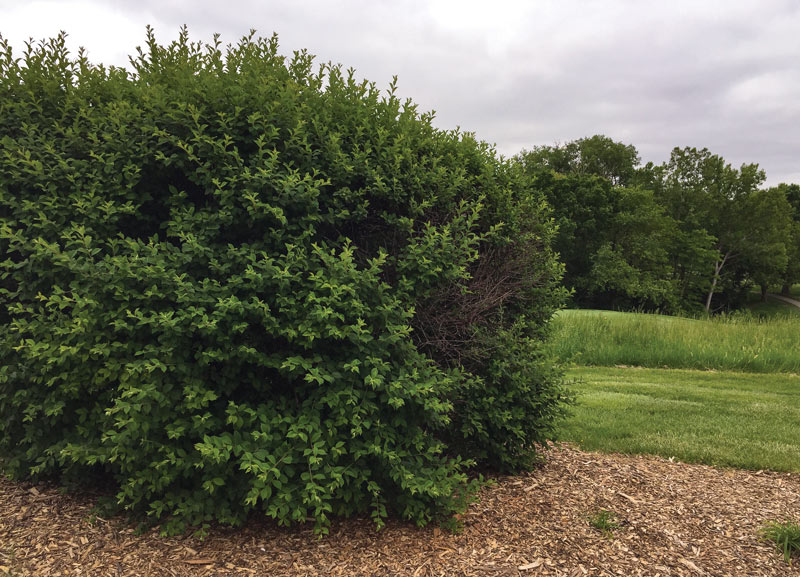
Dead spaces in hedges can be caused by pests or weather-related injuries.
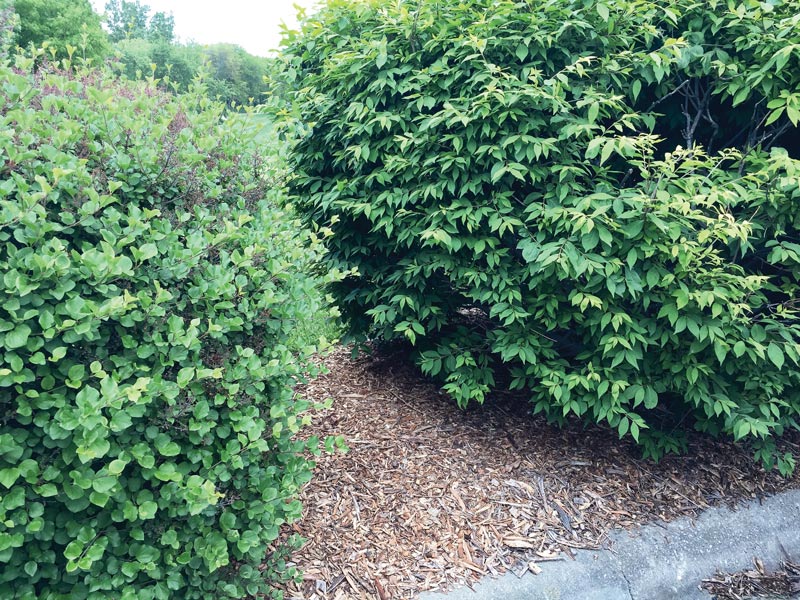
Wood chip mulch deters weeds around hedges.
A dead space will often develop for reasons other than shearing damage. Commonly, injury occurs to the terminal bud because of winter damage or various foliar diseases. Depending on the size of the lack of foliage, the stems on the sides of the hole will sometimes grow laterally to fill in the space, but sometimes they won’t, leaving an unattractive gap.
However, repeated shearing will lead to shape issues as well. In many hedges, the top of the hedge grows to be wider than the bottom. Why? The tops of the plants have access to the best light, usually daylong light. The bottom usually only has access to half-day light, at best. This problem gets worse over time, as the robust top starts to shade the bottom, leading to an inverted trapezoid shape rather than a mounded or rectangular shape. The biggest part of this problem is that without adequate light, the bottom part of the hedge gets thinner and thinner over time and becomes naked or devoid of leaves.
Pruning and shearing solutions
Most deciduous hedges can be pruned to reduce these problems, either through gradual thinning or complete renewal. Both methods are good practices and have value depending on the situation. If you’re dealing with an overgrown, neglected hedge, cutting all the stems off at the ground level — not leaving even an inch — is the best route toward a return to health. This may seem drastic and possibly a hard sell to the green committee, but it’s really a viable technique.
A less stark approach is to thin hedges. This works well with cane or stemmy species such as forsythia, cotoneaster, viburnum, dogwood and lilac. The simple and basic technique is to remove a third of the stems at the ground level each year. The targets for removal are the oldest and thickest stems. Removal of the stems allows sunlight to reach the bottom of the plants, encouraging the growth of new stems to replace the ones removed. Newer stems are more vigorous than older ones and don’t have issues such as cankers, oystershell scale or borers associated with them.
The tool required for this job is a close quarters pruning saw or even a small chain saw. When buying a saw, choose a name brand known for its quality and sturdiness, not a low-priced tool. This is certainly a case where you get what you pay for.
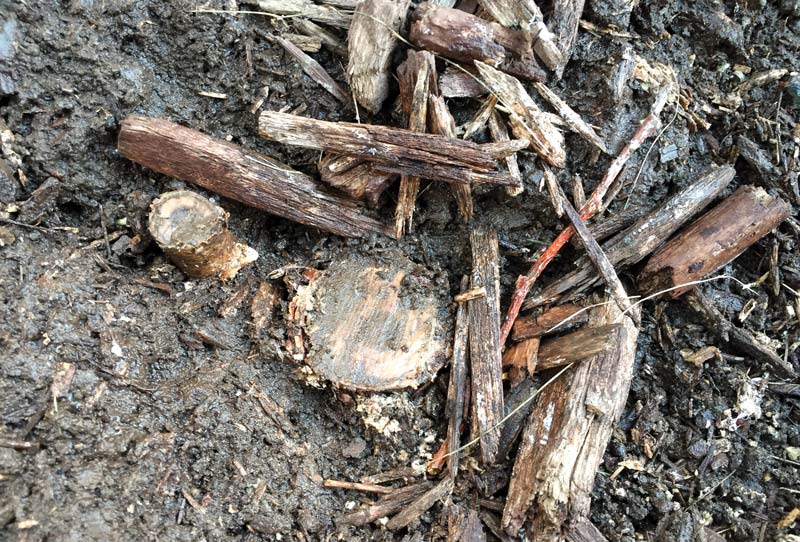
Renewal pruning may seem extreme, but it’s an effective strategy for giving a neglected hedge a fresh start.
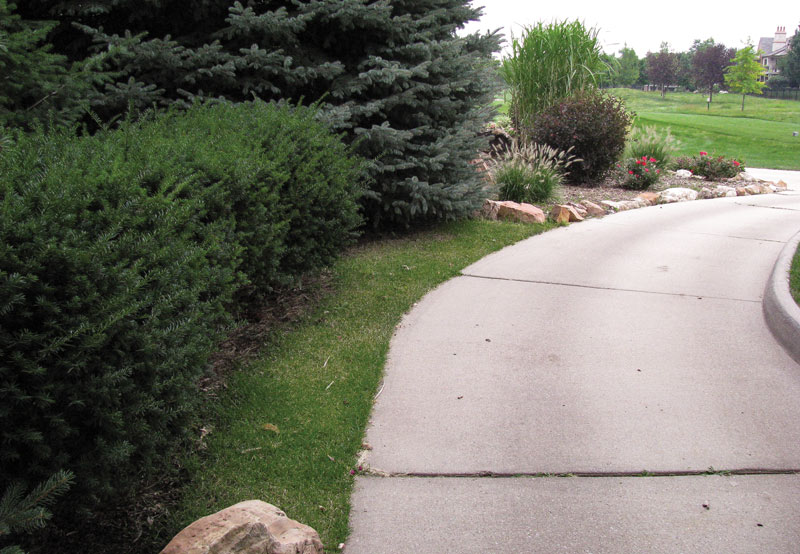
Thinning reduces disease pressure on evergreen hedges.
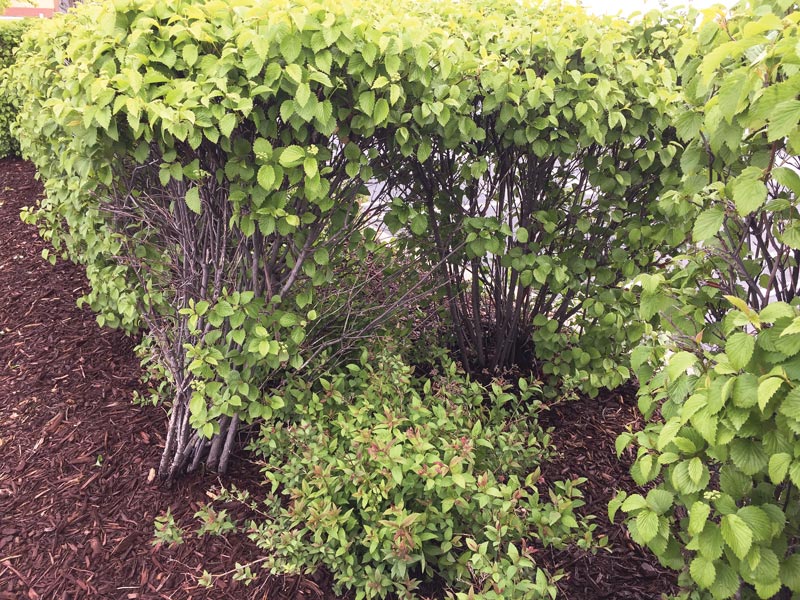
Cover-up plants can be a short-term solution for struggling hedges that need to remain in the golfscape.
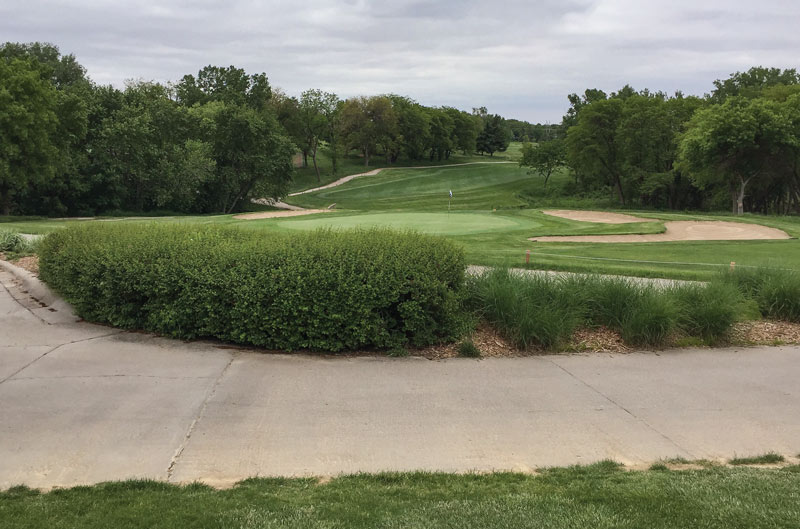
Combining hedges with other plants can lower these features’ maintenance needs.
Most evergreen hedges, such as boxwood, yew and arborvitae, do not respond favorably to renewal pruning. Instead, they die. Thinning is the only acceptable technique to avoid overgrowth and reduce a conducive microclimate for foliar diseases.
It’s vital to avoid cutting into old wood with evergreen branches and stems. However, some (yews, junipers, arborvitae, hemlocks) may be headed back or clipped off after the first flush of growth in early summer.
Editor’s note: How you plant, prune and approach stressors can impact how injury-prone (and costly!) your golf course’s hedges and other ornamentals are. Learn much more in Preventing damage to golf course ornamentals.
When shearing, a template should be used to retain the original shape and to reduce the uneven look created by freehanding with the shears. It’s quite easy to end up with some parts of the hedge taller or wider than the rest, sometimes even on the same individual plant in the hedge.
While repeated shearing can lead to problems, tools such as sharp hedge shears, a good eye and a template made from long wood pieces and string make the process much easier.
Another option for reducing the knotty growth is to remove it by making the size of the hedge 10% to 20% smaller, thereby cutting off the closely spaced buds, nodes and internodes. Depending on the specifics of the species, this may be a good technique to use periodically.
With both thinning and shearing, for evergreens and deciduous plants, it’s important while pruning to keep the top narrower than the bottom to allow the greatest potential for sunlight to reach the lowest leaves.
If a hedge gets really thin at the bottom, and it’s important for that hedge to remain in the golfscape, cover-up plants can be installed in close proximity.
Another approach is to install plants in a hedge-like arrangement that grow well without regular pruning, or to allow the ones that have been previously sheared to grow without shearing for a natural look. This can be a good alternative, particularly for deciduous shrubs such as sumac, lilac, chokecherry and gray dogwood. Nursery suppliers and local university Extension faculty can recommend well-adapted species.
Other hedge maintenance challenges
Encroachment
Hedges almost always grow to be bigger than expected, encroaching into walking spaces or parking lot/car passage/road spaces. This is usually a result of a failure to consider the eventual size and shape of the plants.
Solution: When this occurs, additional pruning is required, but it’s best to prune above or below the previous pruning cuts.
Low flow
Because of closely spaced leaves and stems, airflow through a hedge is usually greatly reduced over a single shrub or even a shrub massing. In addition to the light reduction, the tight spacing creates a conducive microclimate for various foliar diseases to infect the plants.
Solution: Thinning the hedge by removing a third of the oldest stems at the ground level will increase airflow and reduce the potential for foliar pathogens. Depending on the hedge’s placement, it’s likely that the health of nearby turfgrass will improve as well.
Death voids
Another classic problem with hedges occurs when one of the plants in the row dies because of cankers, borers, root rot, girdling stems or scale insects. After the dead specimen has been removed, a large hole remains in the space, not readily replaced with another plant of the same species.
Solution: Refer to the master plan or the landscape architect’s planting plan for specific references to species and cultivars of shrubs chosen and installed for the hedge. Then, fill the space with a medium-sized replacement plant. Resist the urge to buy the largest plant available, as those usually struggle to establish in the hole. Large specimens are usually harvested with a lower percentage of their original roots that were grown in the production field as compared with a small- or medium-sized plant, and larger plants thus have a slower establishment rate. Small plants can struggle too; the sweet spot for replacement is the middle ground. In most cases, a plant of this size will reestablish to the mature size in three to four years.
John C. Fech is a horticulturist and Extension educator with the University of Nebraska-Lincoln. He is a frequent and award-winning contributor to GCM.