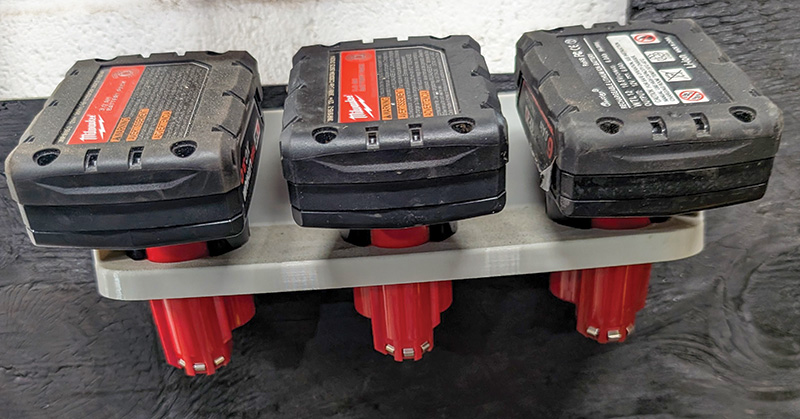
This battery holder is one of the 3D items “printed” by Zach Tolleson and the crew at Camp Creek Golf Club in Panama City Beach, Fla. Photos by Zach Tolleson
There have been plenty of times in my career when a simple attachment or accessory would have made a task easier, improved workflow or enhanced an original equipment manufacturer part. The challenge was always turning that idea into something real.
A 3D printer changes that. We have put our 3D printer to use, and here are some of the areas it has improved our operation.
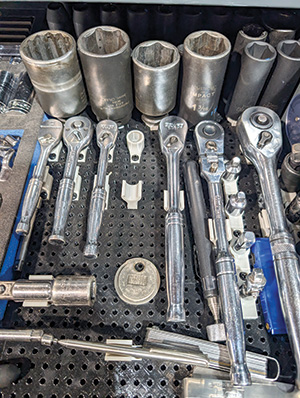
For our mechanics, we used a ToolGrid system to organize tool storage inside toolboxes. We printed battery holders for the charging station. We repurposed a toothpaste squeezer design to make tube products like rtv sealent easier to handle and squeeze the most out of them.
We sandblast and powdercoat our cups twice a year. To get that crisp line at the bottom of the cup, Eben Black, our equipment manager, designed an insert to put in the cup and a vacuum nozzle to clean up any loose powder before baking. We have printed spare gas caps to use while waiting for replacements to arrive. Finding a place to store funnels after use was challenging. We made a funnel storage with a cap at the bottom to collect and dispose of any remnants.
Our spray operation was optimized by printing chemical-resistant utility knives for opening seals. Black designed a bottle lid wrench based on the vision and hand drawings I gave him. We were able to take a broom handle holder and curtain rod holder design and combine them with some modification into a flagstick holder mounted on the front of our sprayers
We like to attach rope lanyards to the blower remotes. The OEM clip broke, so we designed a replacement clip with holes for the rope lanyard.
During early starts around time changes, it was hard for some of the older staff members to see the edge lines on mower baskets before daylight, so we designed and printed bright arrows out of polyethylene terephthalate glycol (PETG) that glues to the top of the existing arrow on the baskets.
These were all simple fixes, but they resulted in big improvements.
Black also created racks to store reels against the wall when not in use. He designed a gantry system for lifting the reels onto the racks. He used a battery-powered winch and designed and printed the docking station to charge the winch.
We have a large landscape component to our operation, and all the cutoff valves are ball valves. We found a design for a valve key for ball valves and printed it.
Our operation has adopted more battery-powered equipment, and the need for battery storage and a charging station became necessary. We printed battery holders out of colored PETG to mount to the charging station wall and signal which battery brand each holder is for.
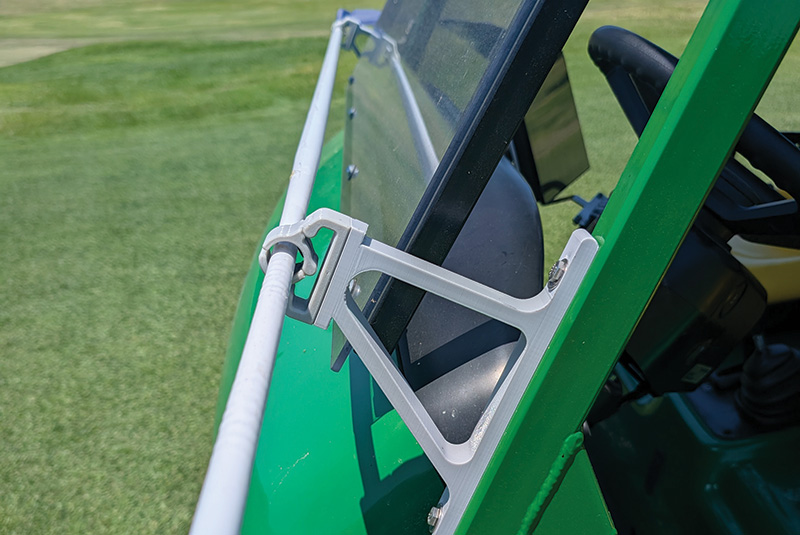
A 3D-printed sprayer-mounted flag holder
Where to start
If this sounds useful for your operation, the first step is choosing the right printer. This article focuses on fused deposition modeling (FDM) printers. The two most common beginner-friendly types are core XY and bed slingers, terms which define how the printer’s build plate moves.
Core XY printers typically have a smaller footprint and often come with an enclosed design. Bed slingers are usually more affordable upfront. For most golf course maintenance operations, core XY machines are the better fit. The enclosure helps keep out dust and debris and allows users to print more advanced materials without needing upgrades later.
ToolGrid-compatible tool holders
We wanted something reliable that worked right out of the box and wouldn’t require constant adjustment. We chose the Bambu Lab P1S, but there are several solid options that meet that goal. We also added a multi-material system, which keeps filament clean and dry while making it easier to print with multiple colors or materials.
Picking a filament
After deciding on a printer, you will need filament, the plastic material the printers use as the “ink” in their prints. There are many options, but these are the ones we use the most. PETG is our go-to for general use. It handles some direct sunlight, has a higher melting point than polylactic acid (PLA) and offers decent chemical resistance. PLA is great for prototyping or indoor use where heat and sun exposure aren’t concerns.
Acrylonitrile styrene acrylate (ASA) works well outdoors and holds up to the elements, but it requires higher print temperatures and an enclosed printer.
ASA, acrylonitrile butadiene styrene (ABS) and nylon can give off strong fumes, so they should be printed in well-ventilated areas.
Keeping all filaments dry is critical. Filaments will absorb water from the atmosphere and produce subpar prints when wet. We use a food dehydrator for drying and store the filament in sealed plastic bags when not in use.
When it comes to creating parts, we take two approaches. Either we find an existing model and modify it, or we design something from scratch. There are plenty of online sites with ready-to-use models, including Printables, MakerWorld and Thingiverse. Most printers come with slicer software that includes basic design tools. For more advanced work, Fusion 360 and Tinkercad are common choices. And if computer-aided design isn’t something you want to learn, hiring a designer is an option.
3D printing can become a deep rabbit hole. But it doesn’t have to be. Choose a printer that fits your needs and budget. Use resources like YouTube to learn the basics. Pick materials based on the environment your parts will face. Once you get started, you’ll likely find more ways to improve your operation and other enhancements you didn’t know you needed.
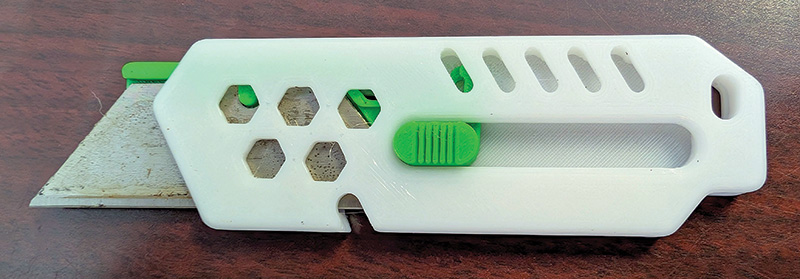
A utility knife with a 3D-printed handle
Zach Tolleson is a Class A superintendent at Camp Creek Golf Club in Panama City Beach, Fla., and an 18-year GCSAA member.